
How to characterize a custom camera/filter combination on each channel, in order to calibrate the color properly.
In the following article we will see how to customize our camera with the filter we have on for a given photo session, to correctly calibrate the color with the Spectrophotometric Color Calibration tool, hereafter SPCC, and also to calibrate the light flux with the Spectrophotometric Flux Calibration tool, hereafter SPFC.
To download the list of filters, click on the following link from Outten Astrophotography :
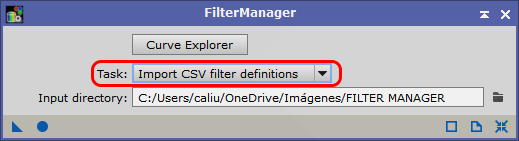
Once downloaded and saved on our hard disk, we open FILTER MANAGER from Spectrophotometry/Filter manager

Once FILTER MANAGER is opened, we import the file where we have all the characterized filters
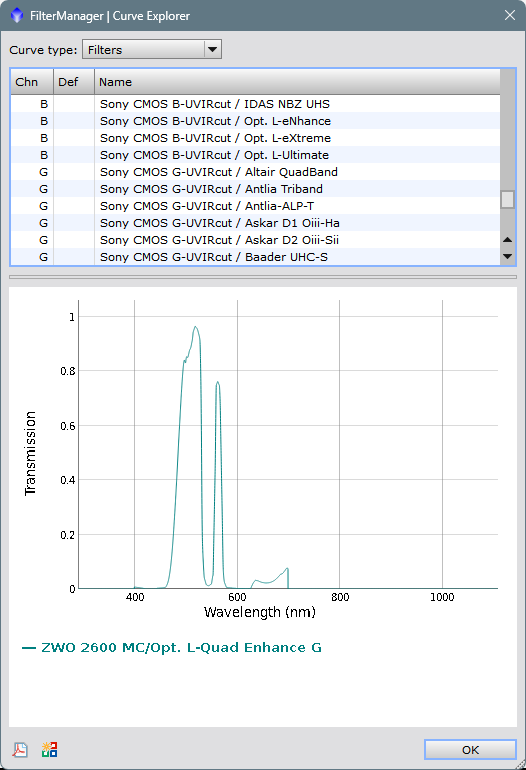
Click on CURVE EXPLORER and the console will appear to combine the filters with the sensors.
The next step is to find out the quantum efficiency of our sensor and compare the graph with the options we have in the filters and sensors drop down menu of the FILTER MANAGER, in my case it is an ASI 2600 MC, that is a Sony IMX 571 color sensor.
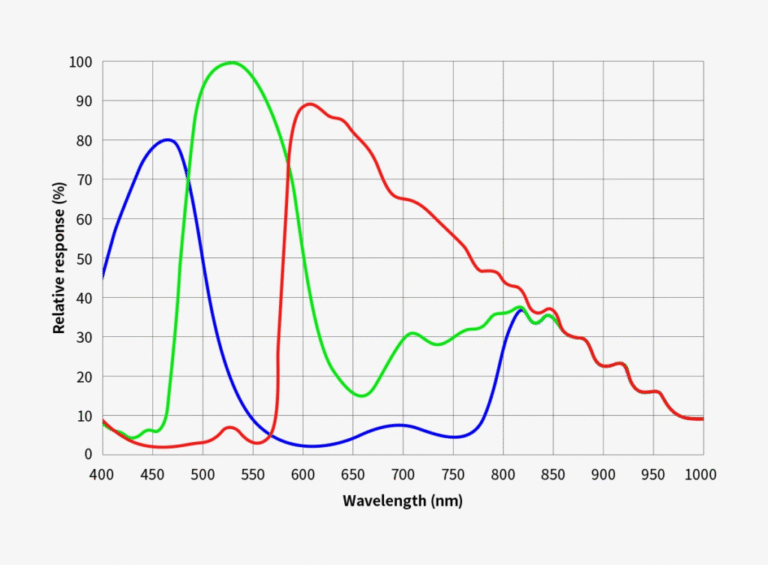
What I have done is to go to the manufacturer’s website and look for the specifications of that particular model, I found the graph of the three channels combined.
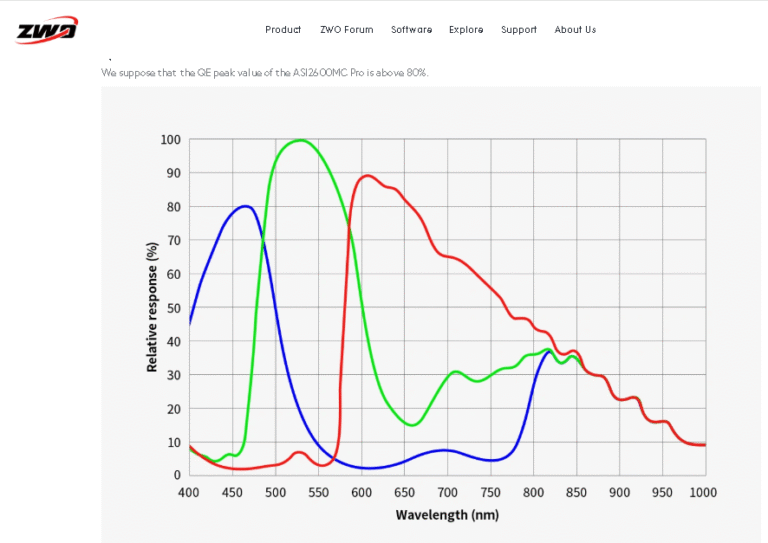
Here we can see the graph of each color channel for the Sony IMX 571 sensor and compare it with the different options of the FILTER MANAGER in order to make a correct camera/filter characterization.
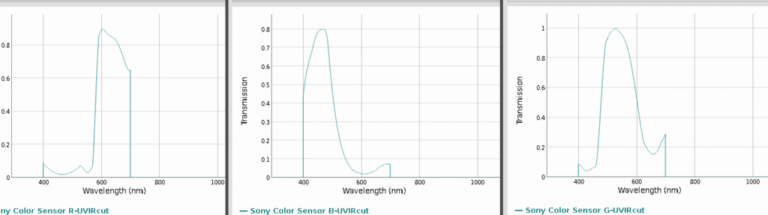
The manufacturer says that my camera has a UV/IR filter on the sensor’s protective glass, so what we will do is look for the option that perfectly matches the curve for each channel. First I have opened the options that end in UVIRcut, but if I compare it with the graph provided by the manufacturer, it is clear that they do not match, especially in the part of the IR (right), which seems that in the manufacturer’s graph is not cut and in the FILTER MANAGER obviously if, look how none of the three channels goes beyond the 700 and a few nanometers which is where the IR emission begins.
And that of the manufacturer:
However, if we choose the UV ONLY options, let’s see that they DO match perfectly channel by channel:
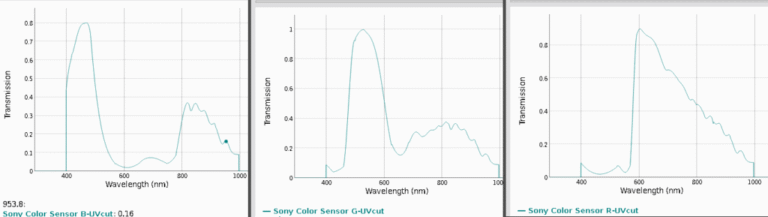
Now we know that our sensor is a Sony Color Sensor UVcut, we just need to choose the filter we want and save it with a recognizable name for when we need to have it at hand.
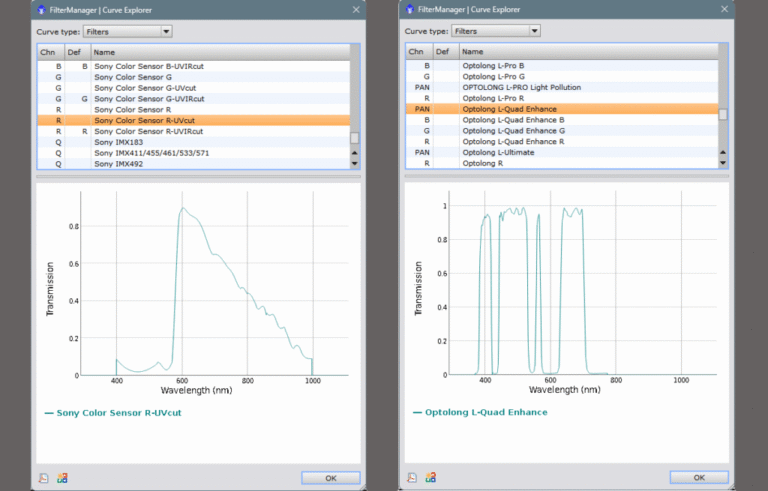
In this case I wanted to configure a mix of ASI 2600 MC + a broadband filter, specifically the Optolong L-Quad Enhance, also known as Optolong L-QEF, so in the FILTER MANAGER dropdown we will first select the Sony Color Sensor we want (R, G or B) and then, pressing ctrl, we will choose the desired filter. I have chosen the Optolong L-QEF because it is the one I was missing to characterize of all the filters I have, so I have chosen the Optolong L-Quad Enhance option but the combined version or PAN, which serves for all channels.
Then we simply click on the multicolor icon on the lower left side and the dialog box will appear where we can name the combination with the name we want, I have put ZWO 2600 MC/Opt. L-Quad R and click on save. I have done the same for the two remaining channels.

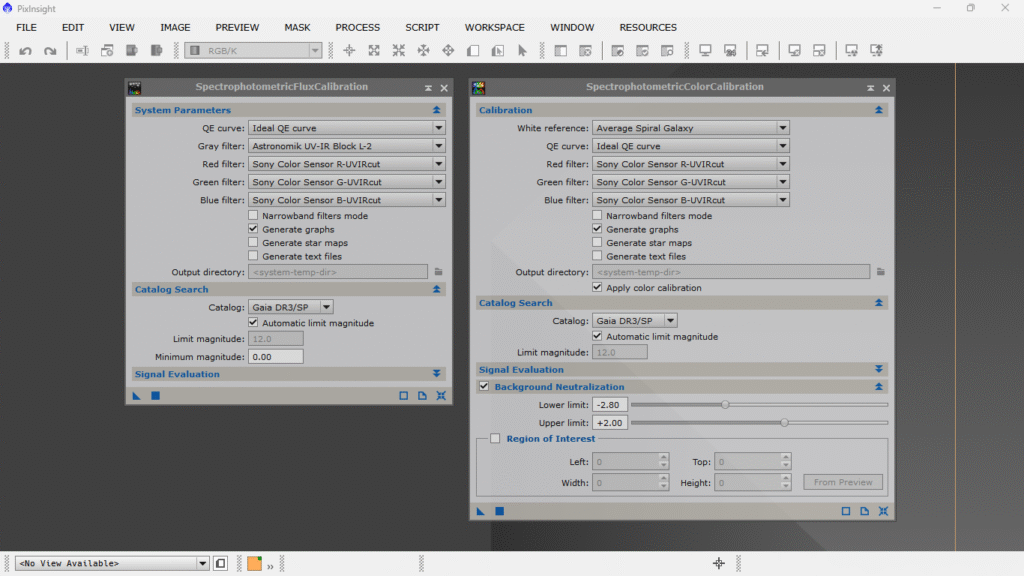
Once everything is saved, we can close FILTER MANAGER and the customized combination will appear in the drop-down menus of both SPCC and SPFC.

And finally, to save the changes we have made in our catalog of filters, sensors and various combinations, simply from FILTER MANAGER select Export CSV filter definitions and click on save in the same place where it was with the blue circle or F6.

Y colorín colorado este tuto se ha acabado, espero que os haya sido de provecho, hasta la próxima!!!
Cielos oscuros!!
Ferran Bosch