Simple guide to using WBPP without issues.
WBPP is the acronym for Weighted Batch PreProcess. It is a PixInsight script that automates the preprocessing of astronomical images. What it does is load your lights, darks, flats, and bias, apply the corresponding calibrations, star alignment, integration, and creation of the final stacked image. The term “weighted” means that it assigns a weight to each image according to its quality (noise, FWHM, stars, etc.), and thus gives more importance to the best ones during stacking. It is useful because it saves you a lot of time and avoids manual errors at each step. We find it in SCRIPT/Preprocessing.
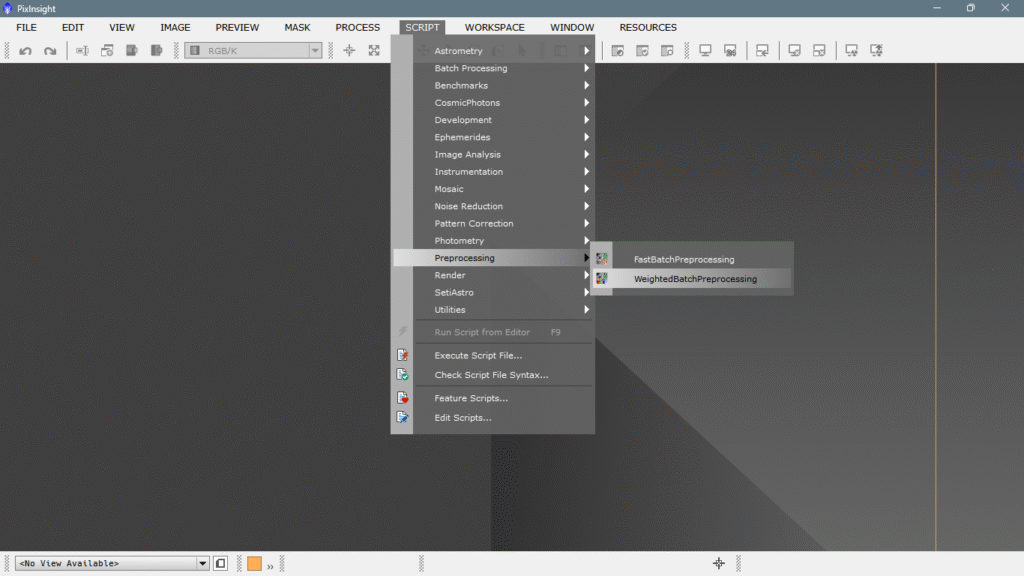
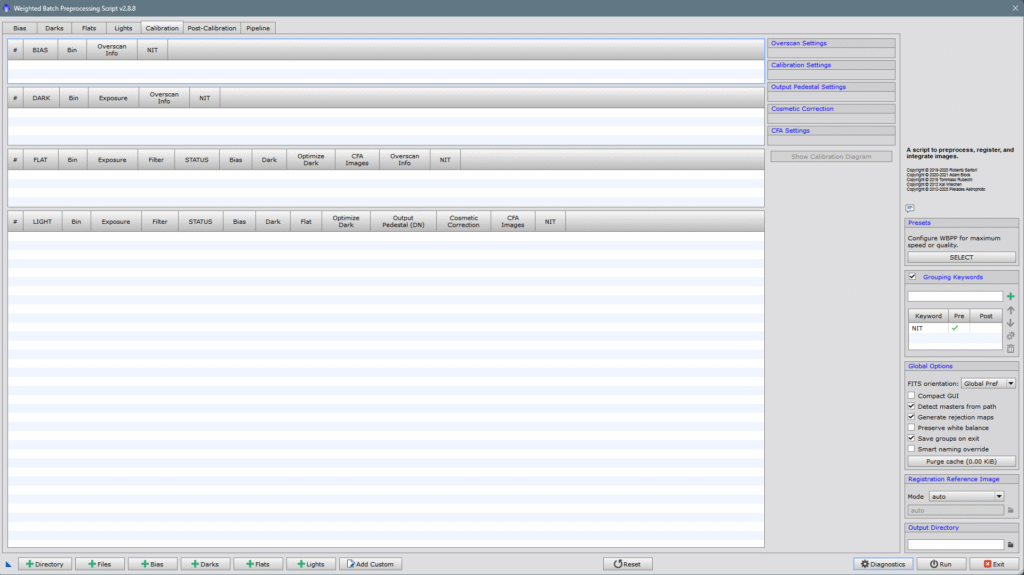
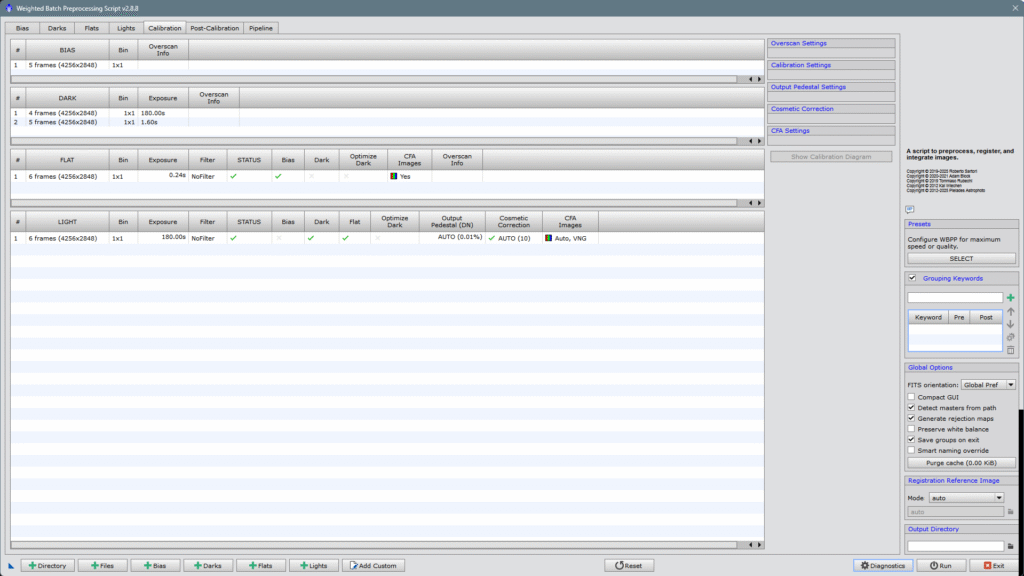
Once we click, a very simple and intuitive interface appears;
1- How to introduce images
Now, what we have to do is input both the actual photos (light frames) and the calibration shots, like flats, darks, bias, and darkflats if we have them. One very important thing, especially for DSLR users with an intervalometer, that is, those who don’t use any capture software and save all the photos on the camera’s memory card, IT IS IMPORTANT TO SEPARATE THE IMAGES INTO FOLDERS and then load the images through the tab of each class of frames as we can see in the image below.

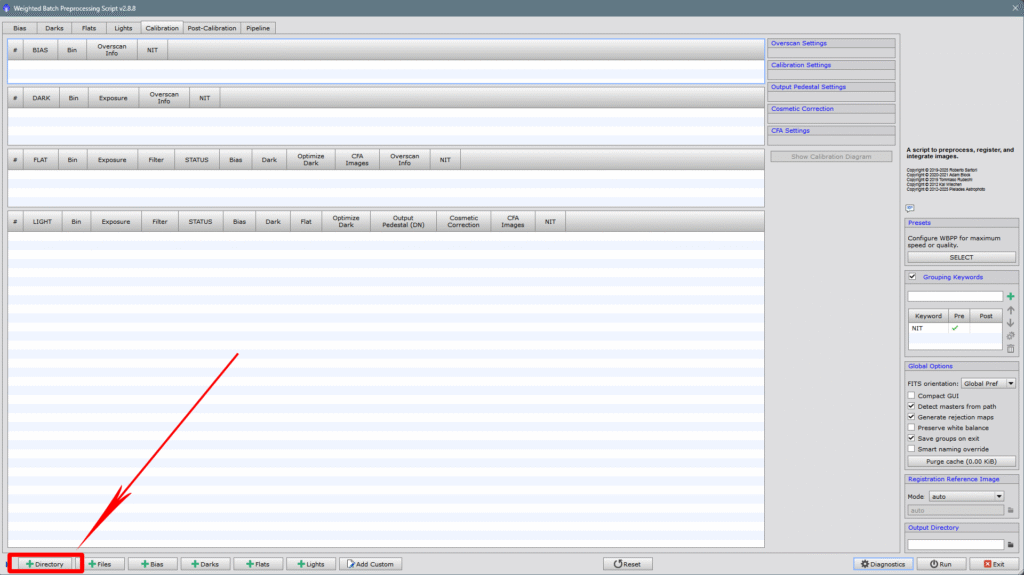
Or with the Directory option, which allows us to select an entire folder with everything inside, if the contents are well organized in folders, the program will read it and know what each thing is, placing everything in its proper place.
For the example I built an ad hoc directory so you can see what the necessary structure would be to do it correctly. The structure should look like this:
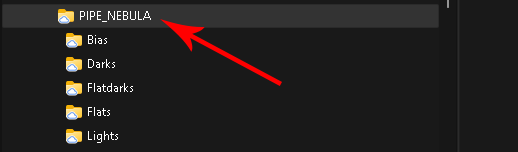
You would only need to select the root folder, which would be named PIPE_NEBULA, and once selected, WBPP would read the entire directory and input each class of frame in its corresponding place. I’ve put in few photos to not make writing the article an endless task, which will be very exciting and didactic, but also very long.
As we can verify, WBPP has sorted everything into its place.
For those of us who use capture software like NINA, ASIAIR, Backyard EOS, etc., we wouldn’t have to do this task of sorting everything manually, since these programs have the “template” function that allows adding to the filename what type of frame it is, exposure time, astrometric solution, temperature if you can measure it, etc. These programs already leave everything well classified and it’s just a matter of clicking on the main directory and that’s it.
2- Configure calibration parameters (CALIBRATION)
Alright, now it’s time to configure how WBPP will treat our images, this is important to understand clearly, as not all sessions will always be the same and you might need to fine-tune or change them.
Reviewing the LIGHTS
What we have to do next is click on the lights row and the display on the right will open, from where we can configure everything that interests us.
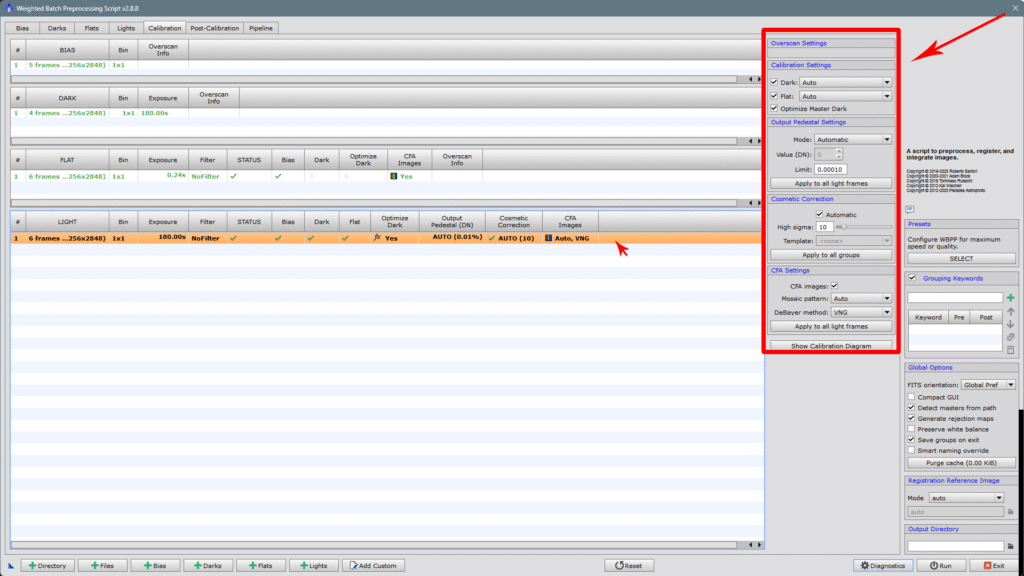
The first thing we find is the option to optimize darks, this is important especially if you’ve shot with intervalometers and the exposure times or temperature aren’t identical. This usually happens with non-cooled DSLRs or with passive cooling, which aren’t operated with capture applications. That is, it should only be used if you can’t make darks with the same temperature and exposure time as the lights.
As this session was done with a DSLR with passive cooling, we activated it. With a dedicated camera where we can control the temperature at will, it should not be applied, therefore we would not check the Optimize Master Dark box.
If we do it, we can click on Show Calibration Diagram and it will show us an entertaining diagram explaining what it does with each group of images.
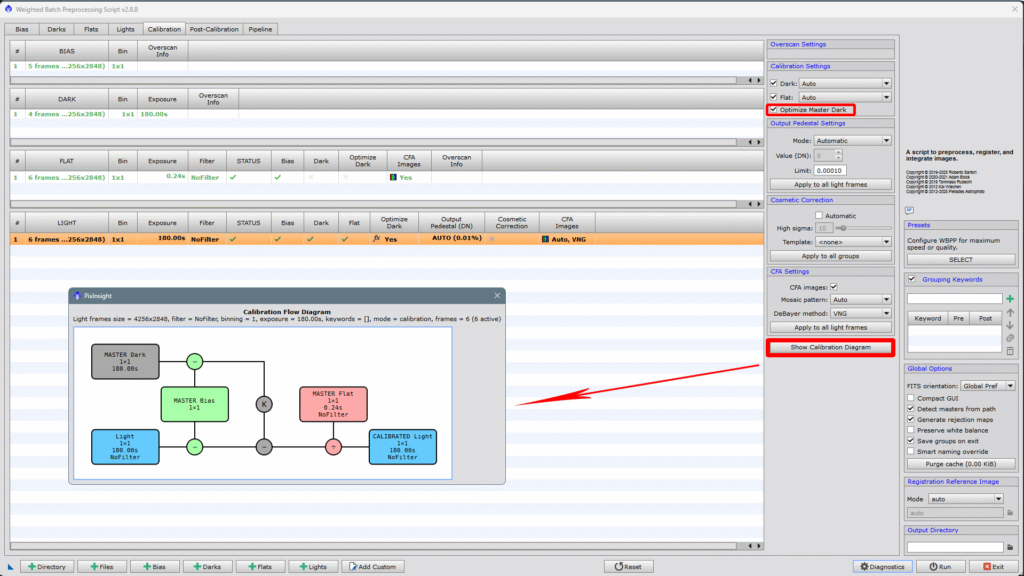
Let’s recap: The «Optimize Master Dark» option in WBPP (Weighted Batch Preprocessing) from PixInsight allows adjusting the master dark to better match the thermal noise level of the light frames, especially if there are differences in exposure time or temperature between them.
How does it work? Internally, WBPP scales the master dark by a calculated factor to minimize the statistical difference (variance) between the light frames and the scaled dark. It’s a process similar to what the «Optimize» option does in the ImageCalibration tool.
Advantages:
Compensates discrepancies if the darks weren’t taken with exactly the same parameters as the lights (time, temperature).
Reduces residual thermal noise better than a non-optimized dark if the conditions vary a bit.
Saves time by avoiding the need to create different darks for each combination of exposure and temperature.
Important: It should not be used with dark flats or with bias, only with darks applied directly to the lights. It should only be used if you can’t make darks exactly matching the lights.
We will leave the darks, flats, and bias sections as default and won’t touch anything. If it works, don’t fix it! hehe.
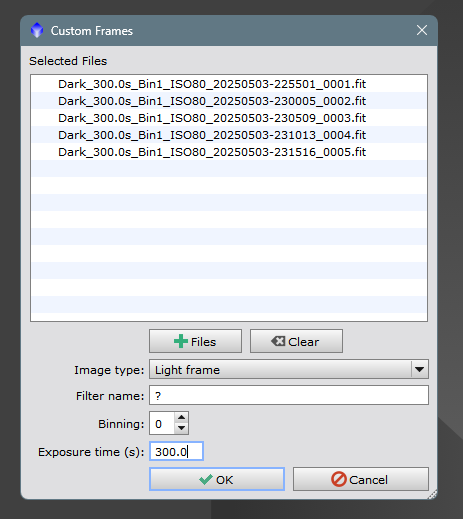
I’d like to explain something else, let’s imagine that by mistake, we placed some lights inside the darks folder and now we don’t want to rename them because it’s a hassle, well, we have the Add Custom option, we simply click on it
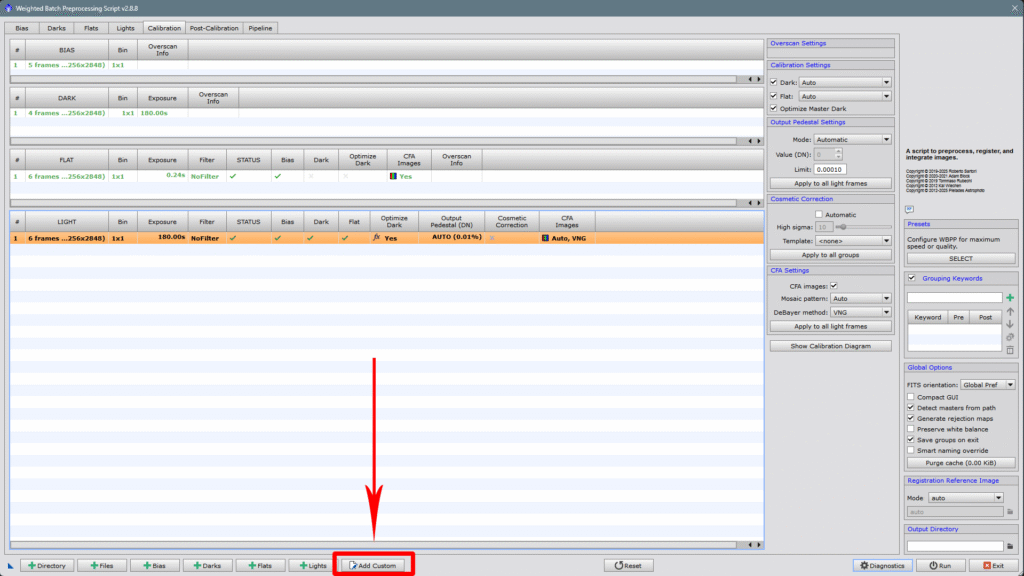
And the dialog box appears, where we tell it that they are not darks, that they are lights and to treat them as such. We’ll enter all the data, including the exposure time, and click OK.
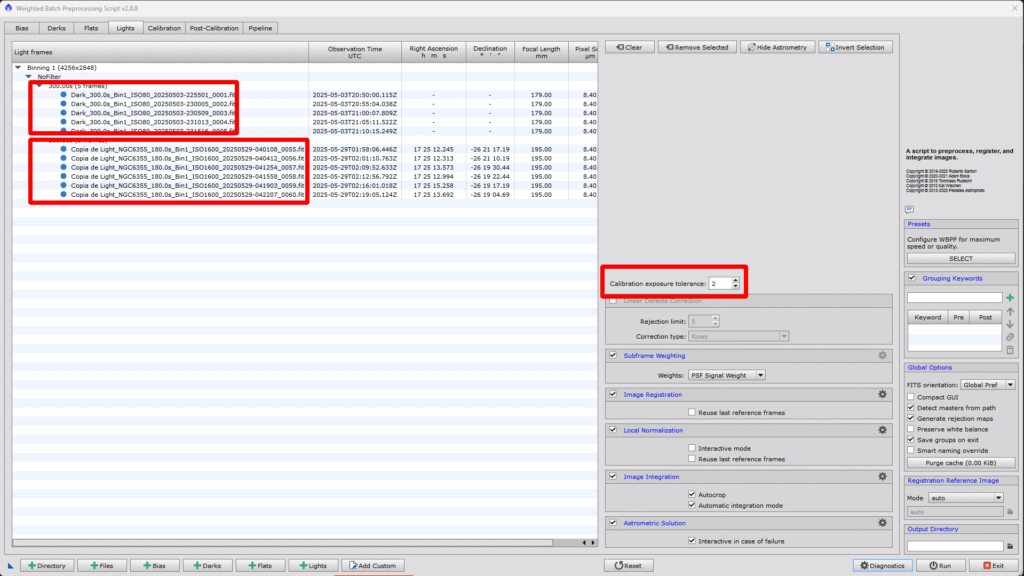
We’ll automatically see how in the Lights box, the indicated files have been added, but now I’ll kill two birds with one stone, it turns out they are not of the same exposure, but we want them all to be processed together. The Lights window has opened when we added those extra files, so to make it process them all together and since we know the difference in exposure time between the two groups or sets of images, we simply calculate it with a simple subtraction and write it in the Calibration exposure tolerance box, since it’s 300″-180″=120″, if we look at the first screenshot where the tolerance value is 2″, WBPP makes two different groups and would make two different master files, look how they are separated!
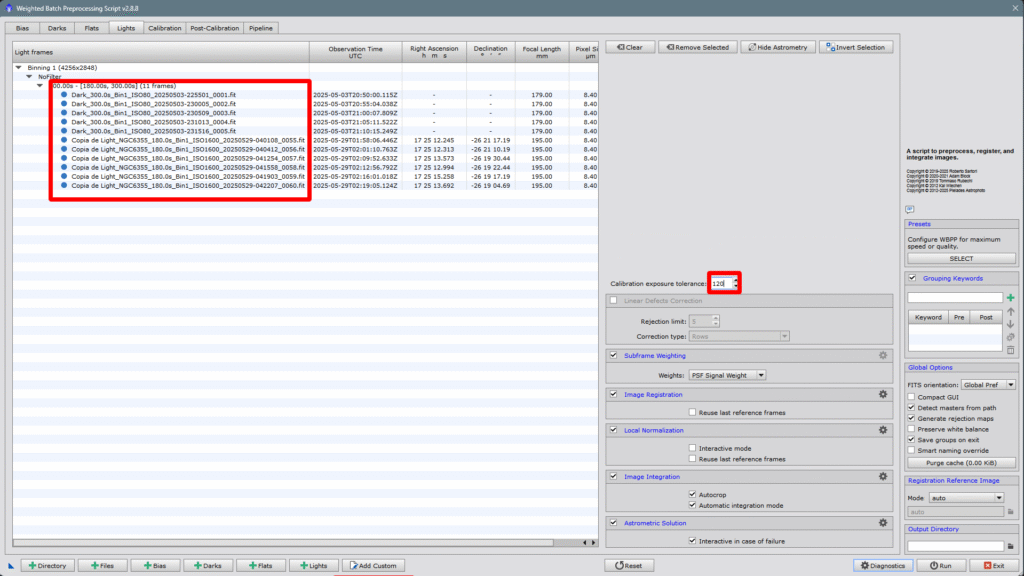
But if we increase the tolerance to at least the exposure time difference between them, which is 120″, it will automatically group all the photos into a single set and will output only one master from all of them.
While we’re here, let’s take a look at all the options we have on the right, what each one is for, and how to configure it according to the optical setup with which the photos were taken.
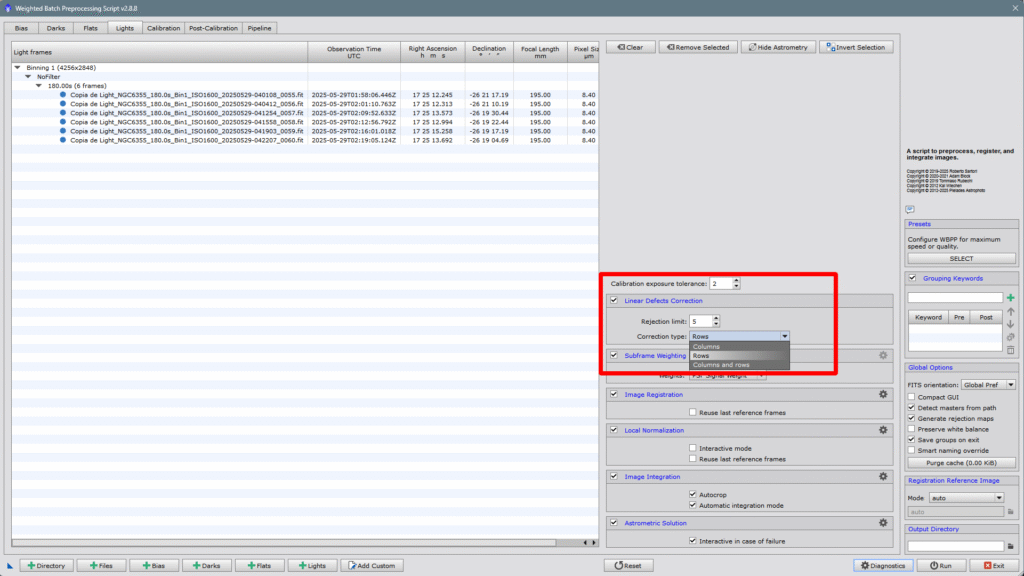
First, we find the threshold selector or difference between exposures, which we’ve already seen before, and the first option we can configure is Linear Defects Correction, which by default is disabled. You don’t need to enable it if you have a camera with a CMOS sensor and/or you’ve taken darks, but if you have a camera with a CCD sensor or simply haven’t taken darks, then it’s advisable to enable it. This is because CCD technology read the information row by row until completing the whole image, while CMOS technology reads the information pixel by pixel, discarding defective pixels at the very moment.
The Rejection Limit allows us to choose the brightness threshold up to which we want to reject pixels in each row, or column, or both—rows and columns. This ensures a more accurate calculation of the statistics of each row or column, without any bias or deviation of the values toward bright pixels. The value is expressed in sigma units relative to the background noise.
The other parameter we can configure is what we want the correction to apply to—whether to rows, columns, or both at the same time.
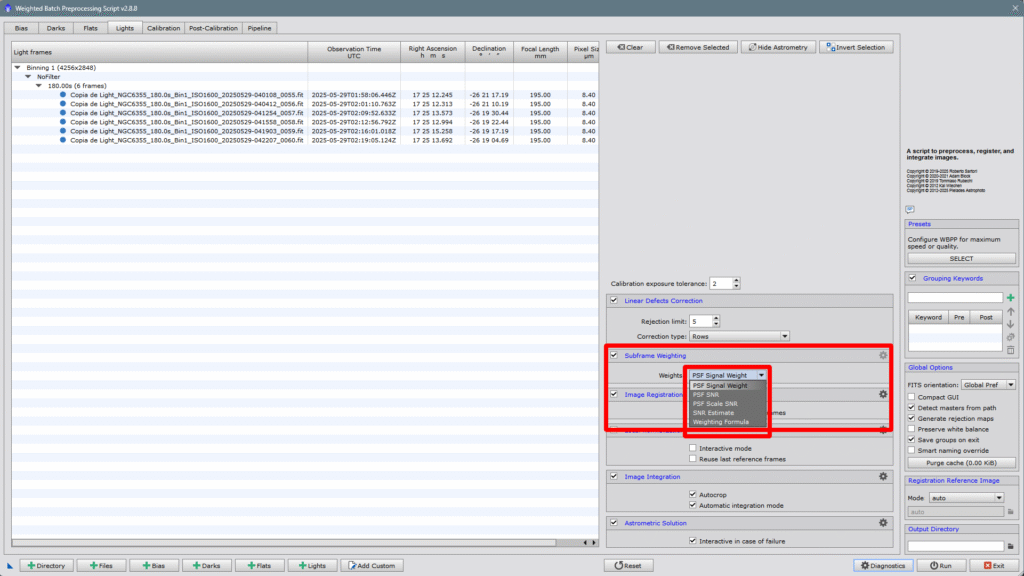
The next parameter is Subframe Weighting, which is crucial because it determines how the program evaluates each image, i.e., it estimates the intrinsic quality of every individual image. The PSF Signal Weight option is the default and seems to be the most robust of all. I’d like to clarify one thing: the default options are usually the ones that work best in the overwhelming majority of cases. That doesn’t mean they are infallible, but before setting them as default, the PixInsight team has tested to determine which option works best in most scenarios.
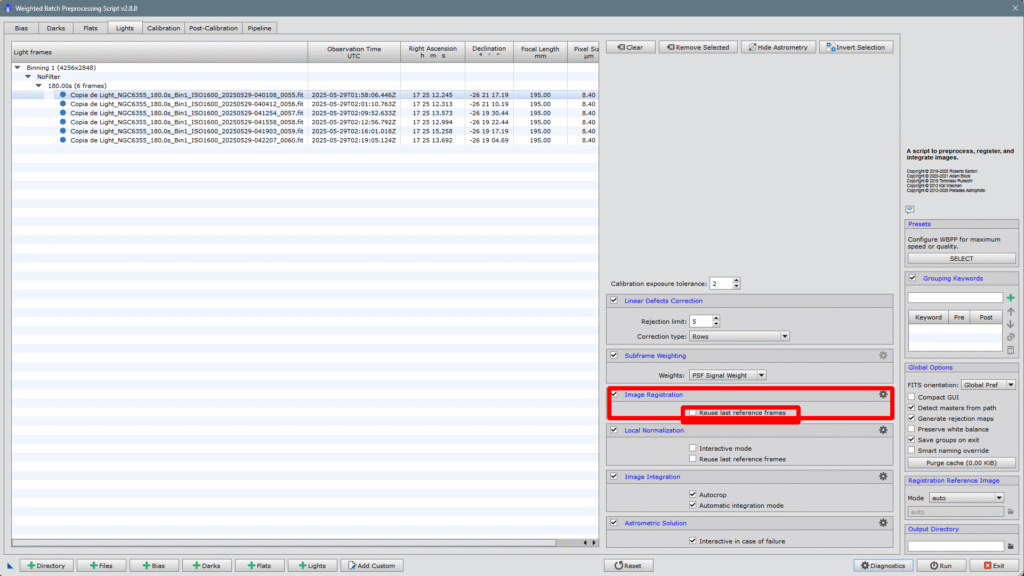
Next is Image Registration, or the alignment of the individual images with each other. If we look closely, there’s an unchecked box where we can reject the last reference image: Reuse last reference frames. That is, for example, if we already have a group of images aligned with each other and want to add more images from a new session, but don’t want to redo all the alignment work again, we should leave this box unchecked. If we check it, all images—both already aligned and new ones—will be realigned, which results in wasted time. So, unless it’s a very specific case, this box should always be left unchecked.
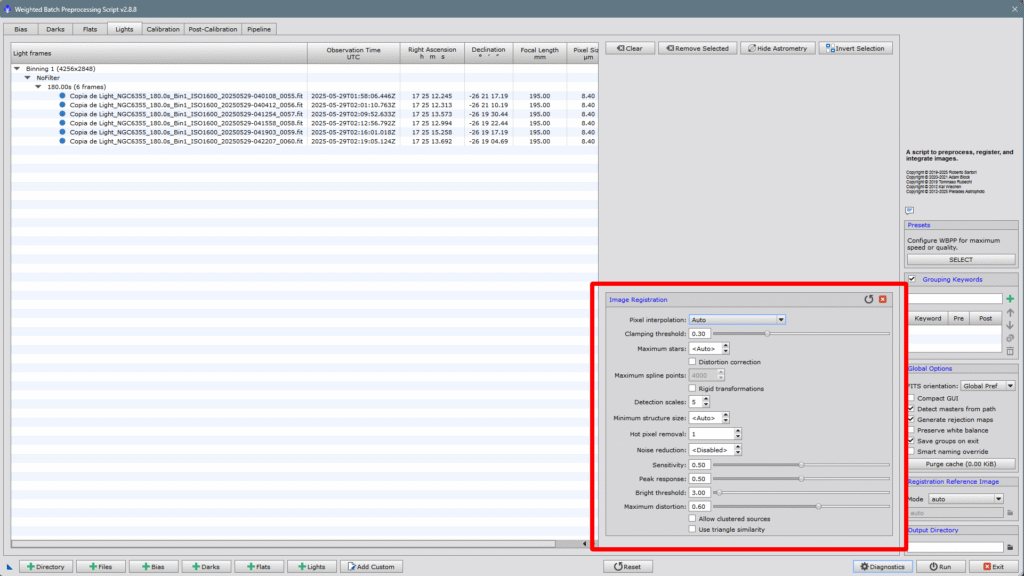
If we now click on the gear icon on the right, we access the configuration panel for the alignment method. Since this article aims to be brief and the goal is to make your life easier, I won’t go into explaining each of them—we’ll just leave it on automatic mode and let WBPP do all the work.
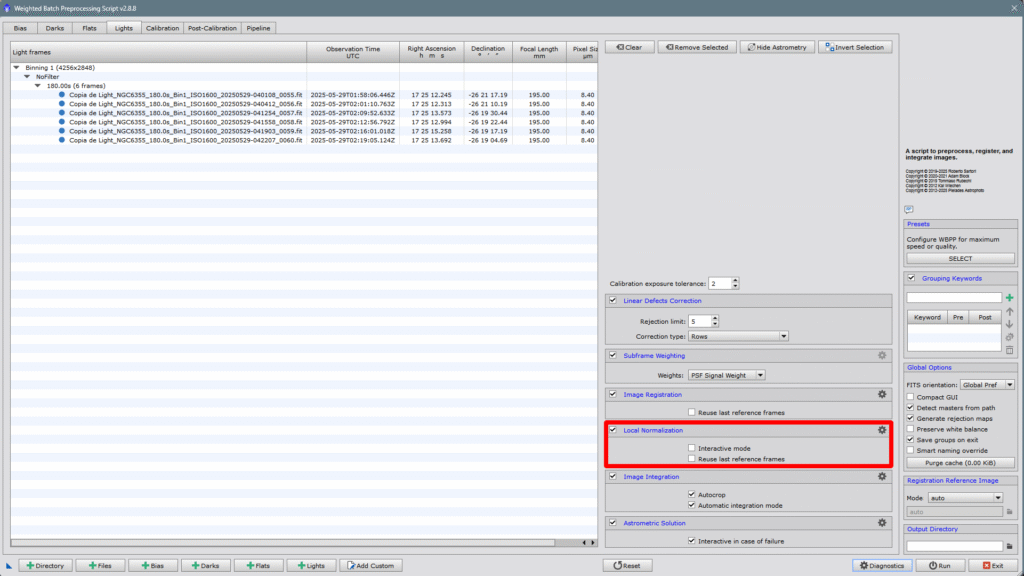
The next point is Local Normalization which, as its name suggests, equalizes the weight of all images using the best ones as reference, thanks to the Subframe Weighting we’ve previously discussed. It also has two disabled checkboxes: Interactive Mode and the previously explained Reuse last reference frames. The interactive mode simply allows the normalization value to be calculated manually. The second option, as we’ve said, would normalize everything again, even what’s already been normalized—so it should always be disabled. Regarding the control panel, which opens by clicking the gear in the upper right corner, I’ll say the same as before: it’s too extensive for this article, we’d lose brevity and it would become too long and tedious. Just leave it as it comes by default, but I encourage you to explore and try it out yourself.
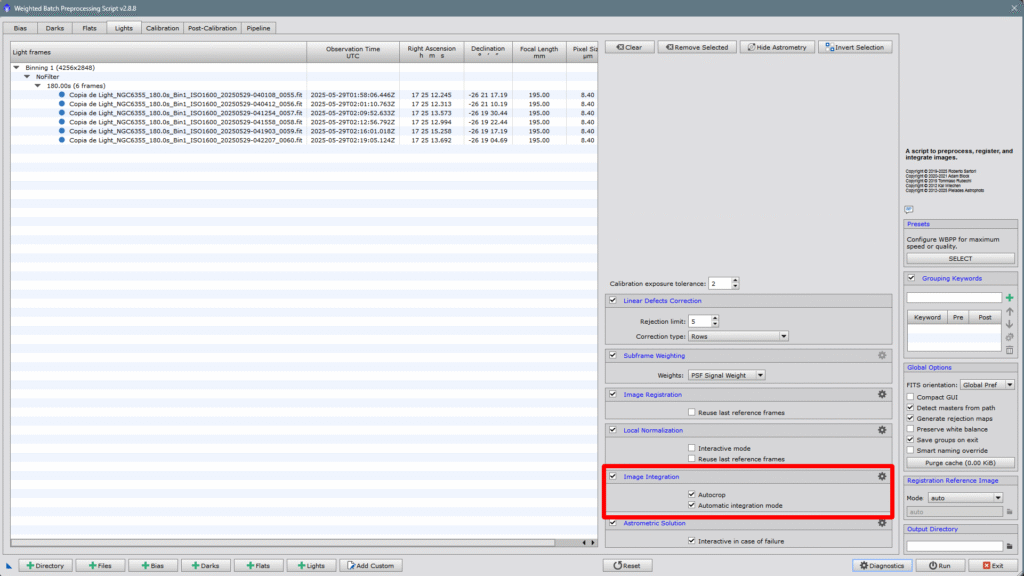
Now comes one of the easiest to configure but no less important—Image Integration. The two checkable/uncheckable options come enabled by default, which means they usually work best in most cases. Autocrop is highly recommended to trim edges where pixels have no information, and the Automatic integration mode’s purpose is obvious.
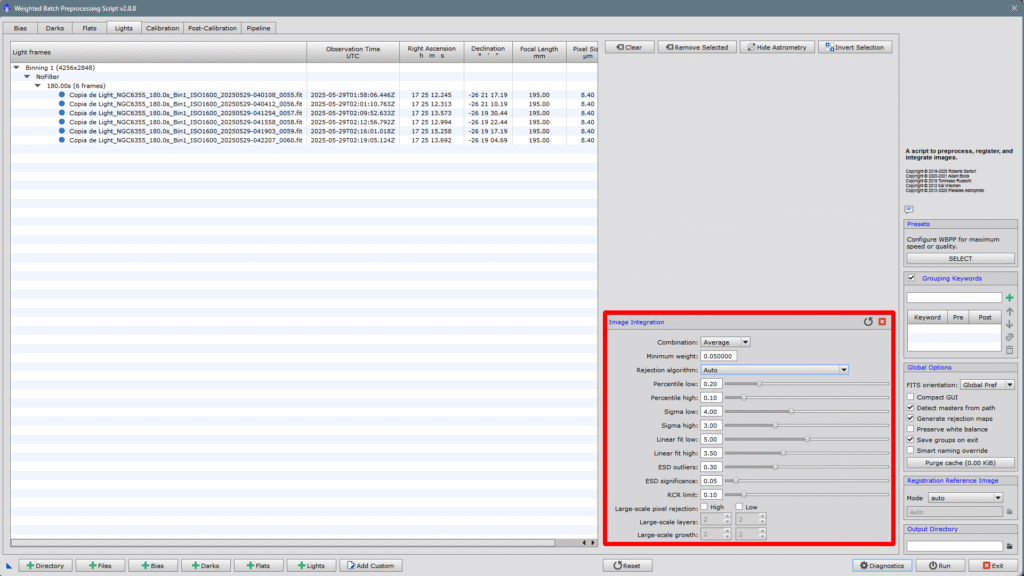
Anyway, the configuration panel is quite intuitive and not too complicated to set up—if you open it, you’ll see for yourself. The combination method lets us choose several options. The most common is Average, the mean or central values, minimum and maximum. Average is the default. The Rejection Algorithm is the mathematical function the script uses to discard unwanted values that stray too far from the average. The sigma and clipping functions are very effective in images with many satellite or airplane trails, etc.
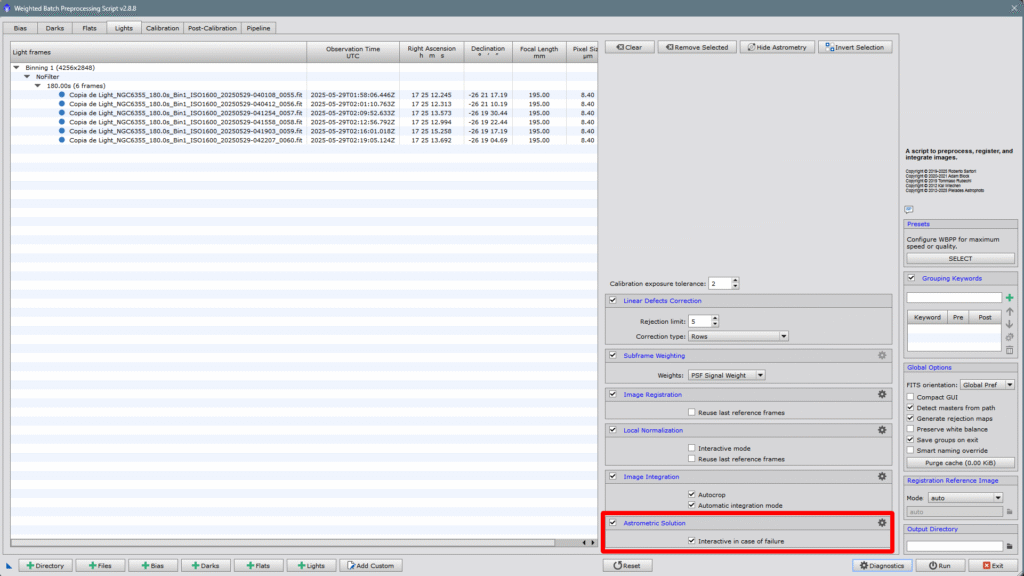
And to wrap up this part, a very important point—Astrometric Solution. I say it’s important because many core PixInsight tools rely on it to work, such as Spectrophotometric Flux Calibration, Spectrophotometric Color Calibration, Multiscale Gradient Correction, etc. It’s a good idea to have the Interactive in case of failure option enabled because sometimes capture programs mess up and don’t properly write the coordinates, pixel size, focal length, etc. When that happens, if this box is checked, it will open the Image Solver window so you can enter the data manually. It usually doesn’t happen, but occasionally it does.
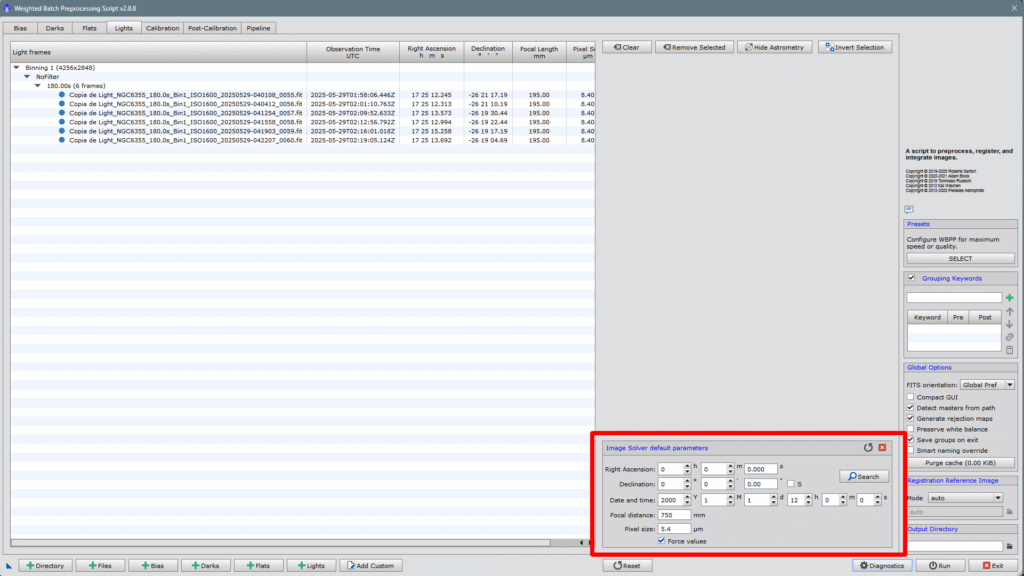
It might also be the case that we’re using a capture program that doesn’t embed the astrometric solution into the output files. In that case, we can tell WBPP the coordinates by opening the control panel via the gear icon—there, we can enter all the data manually and force the script to solve it. Though we can always do it later inside PixInsight using the Image Solver script.
3- CONFIGURE POST-CALIBRATION PARAMETERS (Post-Calibration)
In the next tab, we can configure vital aspects of the final image, such as how to handle the color channels if it’s a color photo, the method of pixel interpolation or drizzle*, and we can also enable or disable fast integration and how the script will handle it.
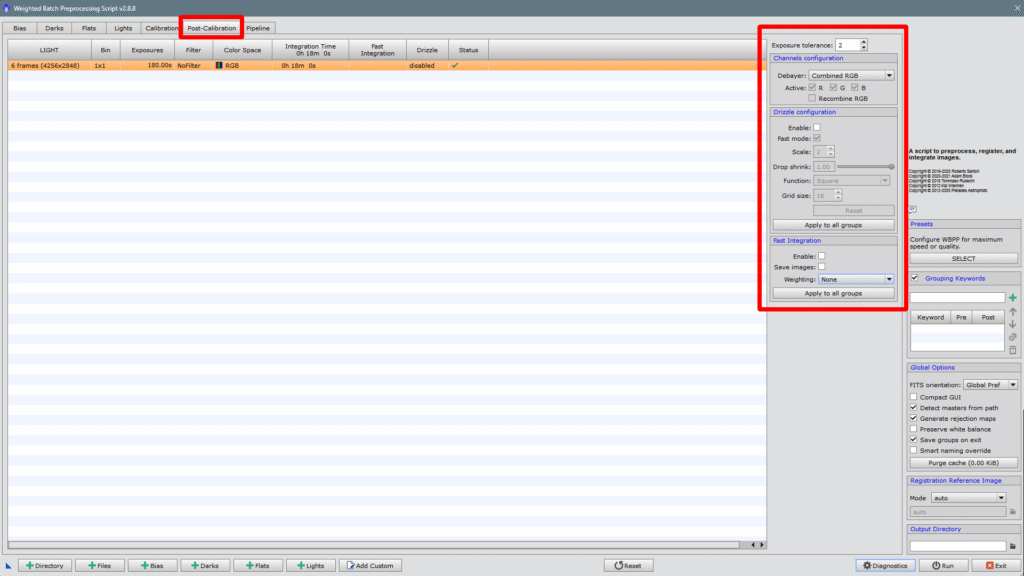
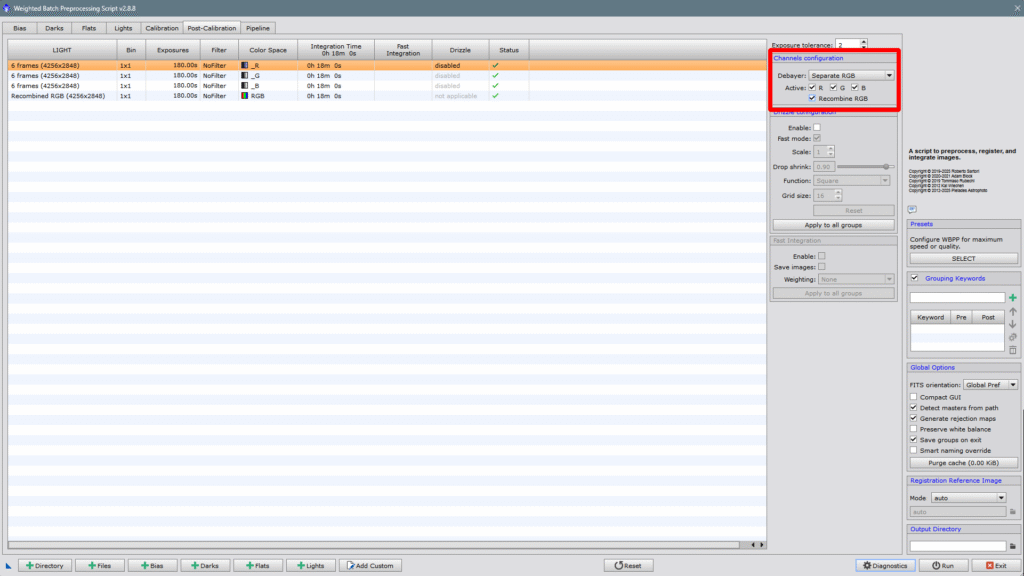
We start with Channels configuration, this section allows us to choose whether we want the three channels to be calibrated together or separately. Obviously, if we choose separately, the calibration will be slower, but it will correct chromatic aberration from certain optics, since it will calibrate each channel separately and then realign them, mitigating the chromatic aberration issue. So we can choose Separate RGB and don’t forget to check Recombine RGB.
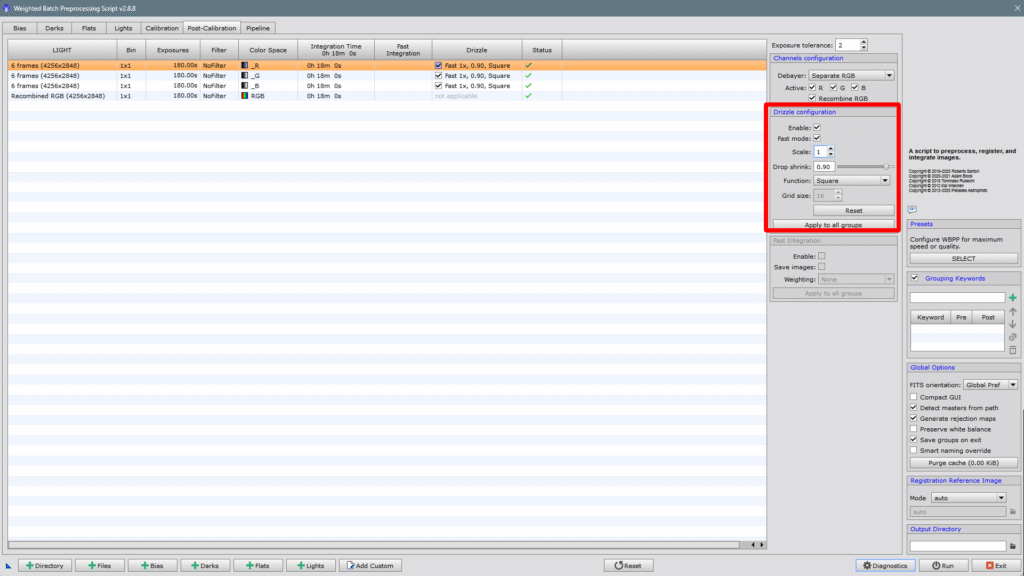
The next parameter is the Drizzle Configuration, but what is Drizzle and why is it so important? Technically, drizzle is an image reconstruction technique that allows for improved resolution and detail in the final image, especially useful when undersampling has occurred with small-pixel cameras or long focal length telescopes.
It consists of combining multiple slightly misaligned (dithered) images to recover lost spatial information.
Drizzle does not invent data, rather it takes advantage of the slight displacement (dither) between different captures to “reposition” the real information on a finer pixel grid. This can increase effective resolution and recover detail that would otherwise be lost with simple interpolation. Obviously, dithering must be done with the recommended values according to pixel size and focal length. You can calculate the dithering you need on this website: LINK
On the other hand, with traditional pixel interpolation, what is done is estimating new values between pixels based on neighboring pixel values. It doesn’t add real information, it just smooths or redefines what’s already there — in a way, it invents information. Drizzle does NOT.
Keep in mind that you don’t always have to use Drizzle by default. Below we clarify when it’s good to use it, and when it’s not:
When it’s worth using Drizzle:
You have many images (frames): The more images, the better it works. Ideally, more than 30-40.
You’ve applied dithering during capture: The displacements between captures are essential so that drizzle has new data in each image.
Your image is undersampled: That is, the camera’s pixels are very small compared to the telescope’s optical resolution. In that case, drizzle can recover real detail.
DSLR or OSC cameras with Bayer matrix: The CFA drizzle option can significantly improve sharpness and color.
When it’s not worth using Drizzle:
You have few images: With fewer than 15-20, there’s not enough data to build the “extra” information.
You haven’t done dithering: If the images are perfectly aligned, drizzle can’t add any new detail.
Very noisy or low signal images: Drizzle can amplify noise if there’s not enough information.
Monochrome cameras with 2×2 binning: You won’t have enough resolution to benefit from it.
Once these concepts are clear, if we activate Drizzle, we must know that we can do it without increasing the file size (X1) and up to a maximum of X4. The higher the value, the larger the result and the heavier the process. If we have several image groups, we must click on Apply to all groups.
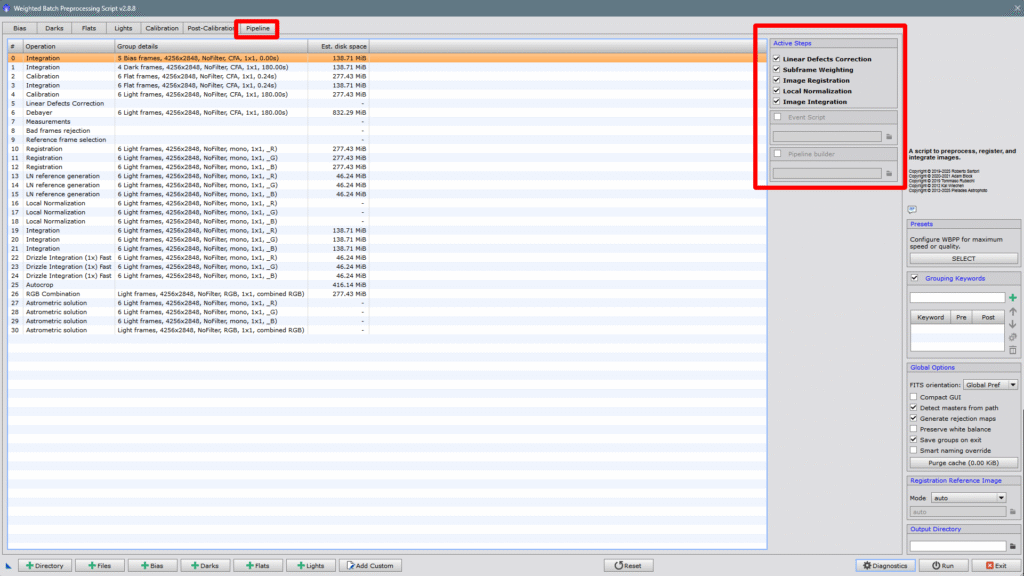
4- PIPELINE (process summary)
As its name suggests, the pipeline is a summary, an index of the processes that will be applied to the different images, the weight each process will have, and how many images are in each group. If we look at the side panel, we can disable whatever we want or anything we’ve defined by mistake.
5- PRESETS (Predefined settings)
We click on SELECT and the dialog box will open where we can adjust our preferences.
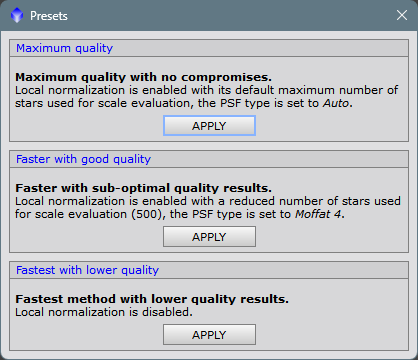
1- Maximum quality, lower speed
2- Medium quality and slightly faster speed
3- Minimum quality but maximum speed
6- GROUPING KEYWORDS
One of the best features WBPP has. It allows you to load images from different sessions and have each group of images calibrated with their corresponding flats, darks, and bias from each session (flats should always be new), with just one click.
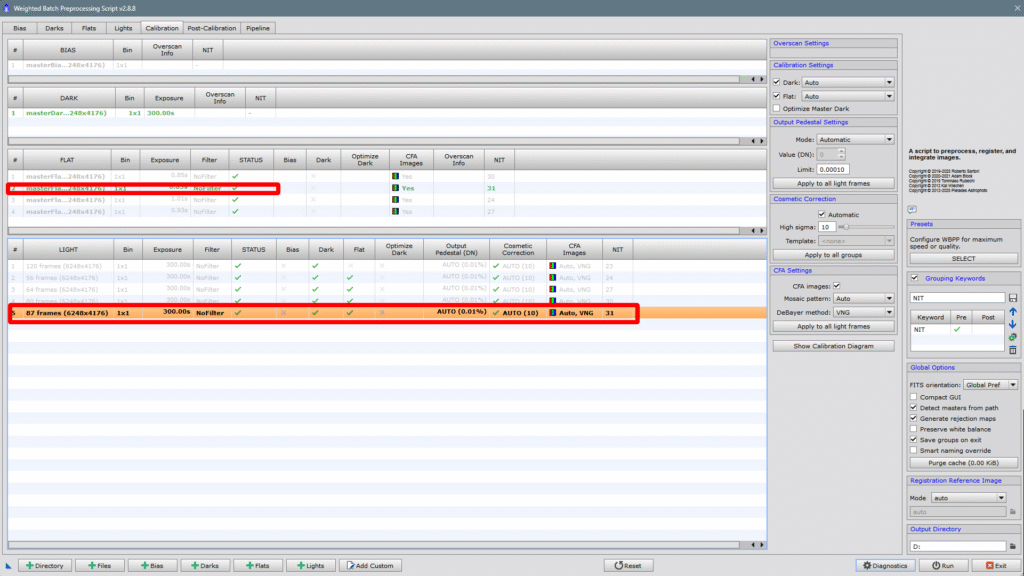
The trick is to choose the correct keyword. The most common is to choose the word SESSIO, but you can name it whatever you want — just make sure the folders all contain that word. You can have images from 4 nights inside a folder named SESSIÓ, and within it, you can have SESSIO_1, SESSIO_2, SESSIO_3, and SESSIÓ_4 (for example), and within each of those folders, you can have more folders with the flats, darks, and bias from each session. You just need to write the keyword next to the green cross and press it. I chose the keyword NIT, and inside the NIT folder, I have several subfolders that contain the lights and flats from each specific night. I just need to write the keyword NIT (I don’t have bias or darks because I reuse master frames from previous sessions to save processing time), go to Directory, find the NIT folder, select it, and WBPP will open all the files ordered by different nights, each with its own appropriate flats, without mixing any images.
Here’s how it looks after loading everything:
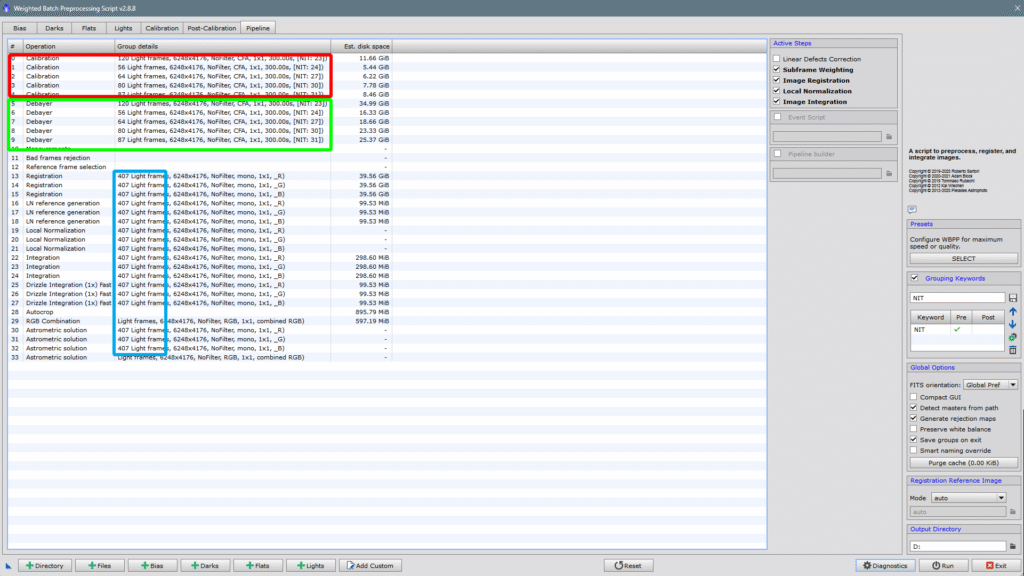
Each night or photo session has its corresponding calibration data session, but the light frames — in other words, the individual photos — will all be registered together and also integrated together, which will give us a much better signal-to-noise ratio than if we did each night separately and then integrated the masters. If we take a look at the pipeline, we’ll see perfectly what I’ve just explained:
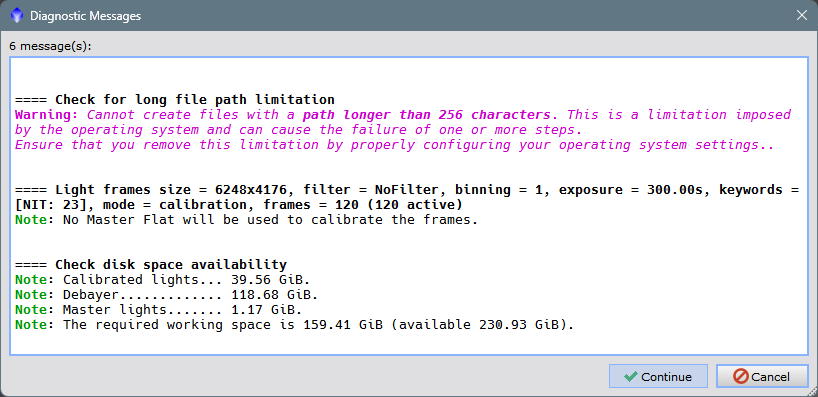
And finally, all that’s left is to tell WBPP where to save the results. I’ve sent it to the D: drive, which is an external hard drive. When clicking on Diagnostics, a summary will appear with recommendations or not (if everything is fine).
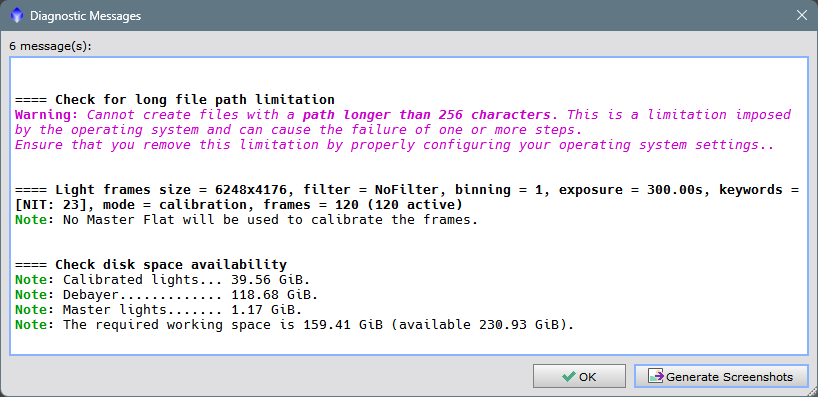
It warns us of something very common in Windows — such as the length of names in paths or filenames — they cannot exceed 256 characters. This is a Windows problem, not PixInsight’s. We click OK and then Run, the warning will appear one last time, we click on Continue, and all that remains is to wait for the final result, which will be in the destination folder with all the files and all the masters that WBPP will create.
There’s still a lot to explain about WBPP and the many things you can do with it. I believe the summary I’ve made can help people who are not entirely sure how to use it. I hope it’s useful and helps in some way.
I’ll be back soon with more articles on PixInsight and how to use it without suffering.
See you soon!!