The essential astrometric solution.
PixInsight’s Image Solver script is a fundamental tool used to astrometrically solve an image, that is, to accurately calculate the correspondence between the pixels of the image and real celestial coordinates (RA/DEC).
–It analyzes the stars in the image and tries to recognize them by comparing them with a star catalog (such as Gaia or APASS).
If it finds matches, it calculates the astrometric projection of the image, that is, it determines:
Coordinates of each pixel.
Center of the image (RA/DEC).
Orientation (rotation).
Image scale (arcseconds per pixel).
It writes all this information into the FITS header or as internal metadata in PixInsight (WCS: World Coordinate System).
What is it for?
Color calibration with SPCC: SPCC needs to know where you’re pointing (RA/DEC), the scale, and the center of the image to find real stars and perform the comparison.
Photometric and astrometric analysis: Allows precise measurements of objects, finding their names, or cross-referencing them with other catalogs.
Integration with other tools: For example, SubframeSelector, MosaicByCoordinates, Annotation Scripts, etc.
Creation of annotations: Allows adding names of stars, constellations, galaxies, etc., onto the image.
Geometric corrections: For precise alignments based on real coordinates.
Why is it so important?
Because it gives real context to the image within the sky. Without solving it, PixInsight can’t know what you’re seeing, nor compare your image with star catalogs, nor perform any coordinate-based operations. It’s like putting GPS on your astronomical photo.
In short: if you want to do color calibration with SPCC, advanced analysis, annotations, or precise mosaics, Image Solver is essential.
Most capture software such as NINA, Asiair, StellaVita, BackyardEOS, etc., save the fits with the astrometric solution embedded in the header of each file; however, sometimes external stacking programs outside PixInsight delete this data or write the .fit files incorrectly, and then WBPP cannot solve the plate on its own, so that’s when we must configure it manually. In the article dedicated to WBPP, we will see how to force the script to include the coordinates we want. In this article I would like to describe which parameters we can configure manually.
Here we have it:
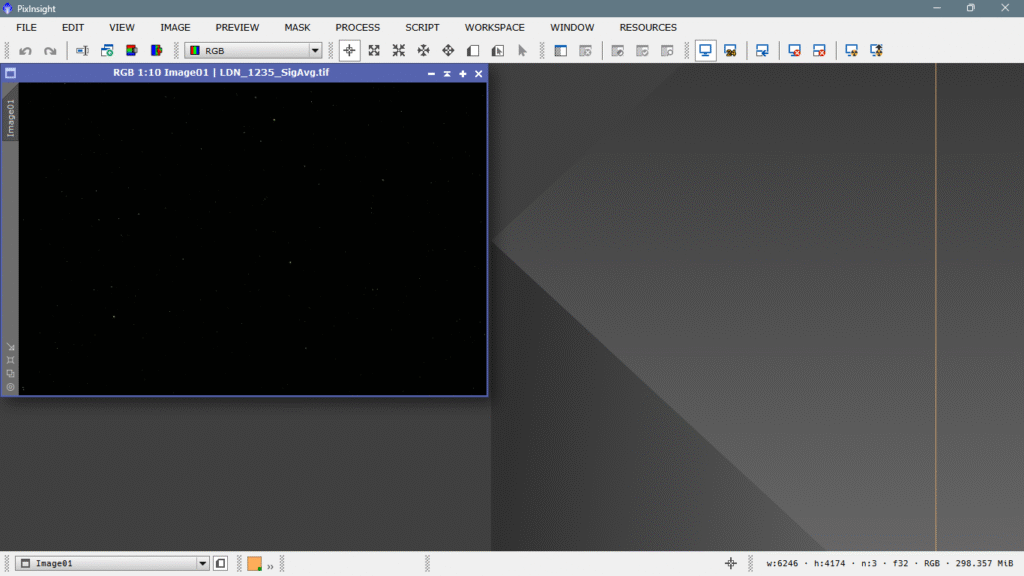
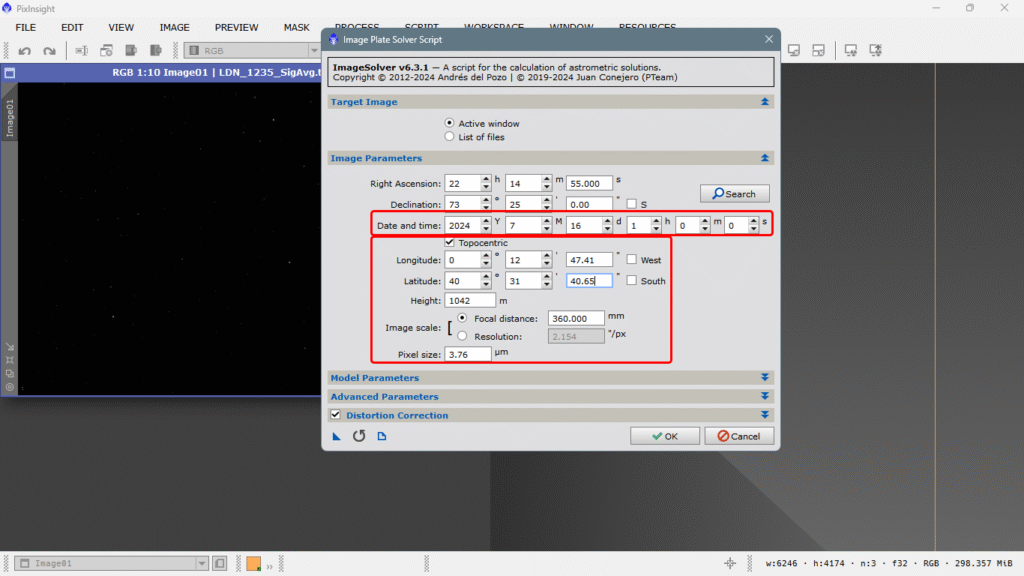
For the example, I used an old image from when I calibrated with an external program called Images Plus, which calibrates very well, but writes the .FIT files very badly, incorrectly, and obviously they are incompatible fits with PixInsight, so I had to save them as .TIF and of course, no astrometric information was saved in the metadata.
That’s why I have to open Image Solver and input the data manually.
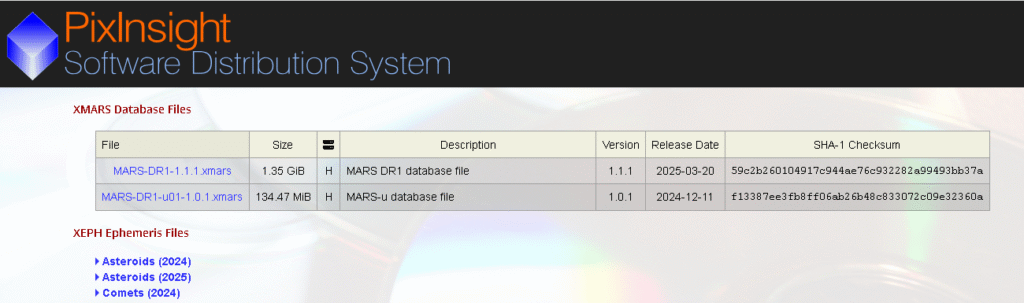
I assume we have the GAIA catalogs installed on our hard drive, never inside PixInsight, because when updates are made, all folders are deleted and everything would have to be reinstalled.
If we have an internet connection, Image Solver will search for the object’s coordinates on external servers if we don’t have the GAIA catalogs downloaded; if that’s not the case, Image Solver will always use GAIA by default. The downside of external servers is that they usually fail more than a fairground rifle.
The image without astrometric data is of LDN 1235, also known as the Dark Shark.
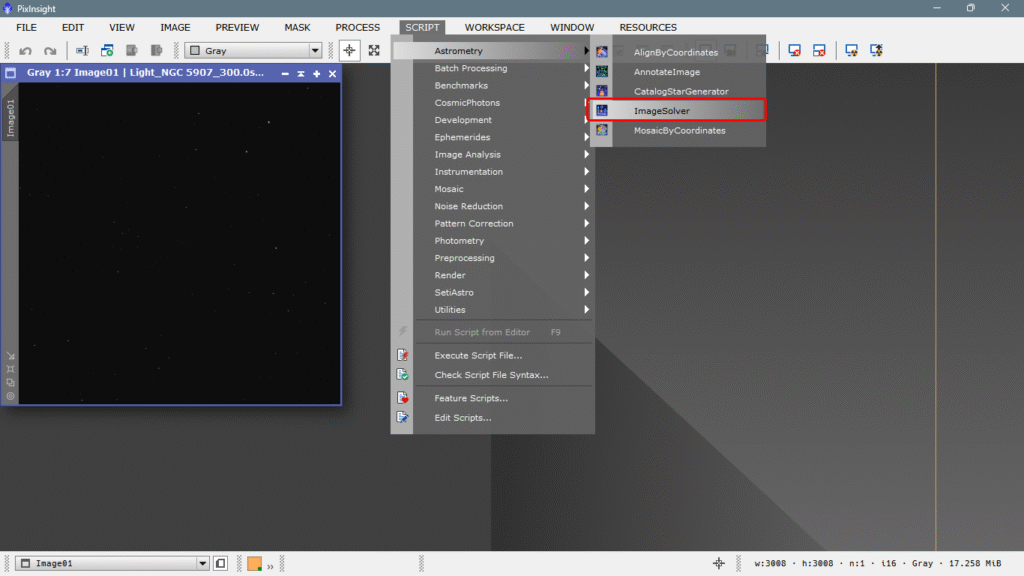
We open the script and the Automatic catalog option is already selected by default. We leave it that way, and it will do what we said earlier: it will search in GAIA, and if it doesn’t find it and we have an internet connection, it will search on external servers.
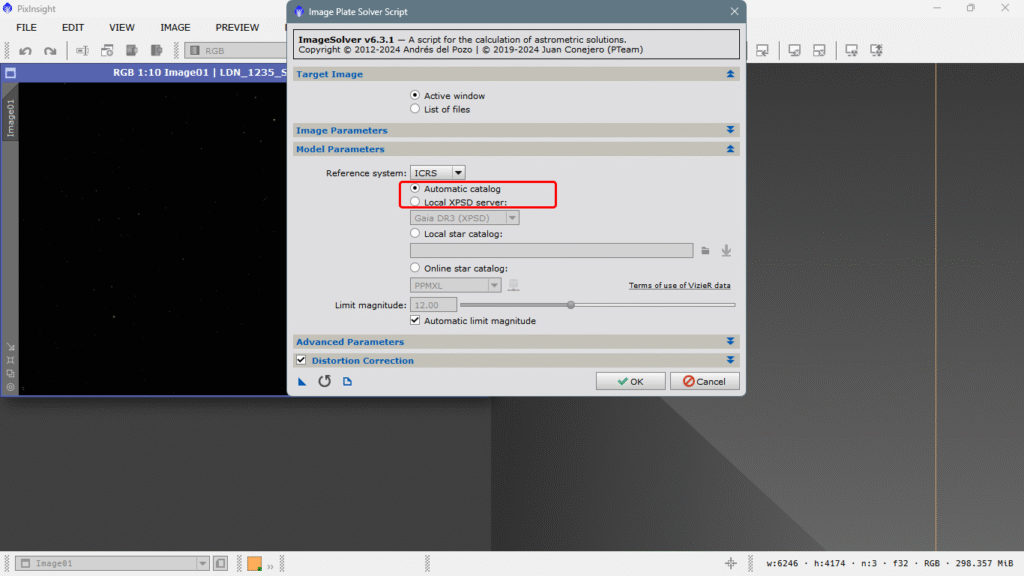
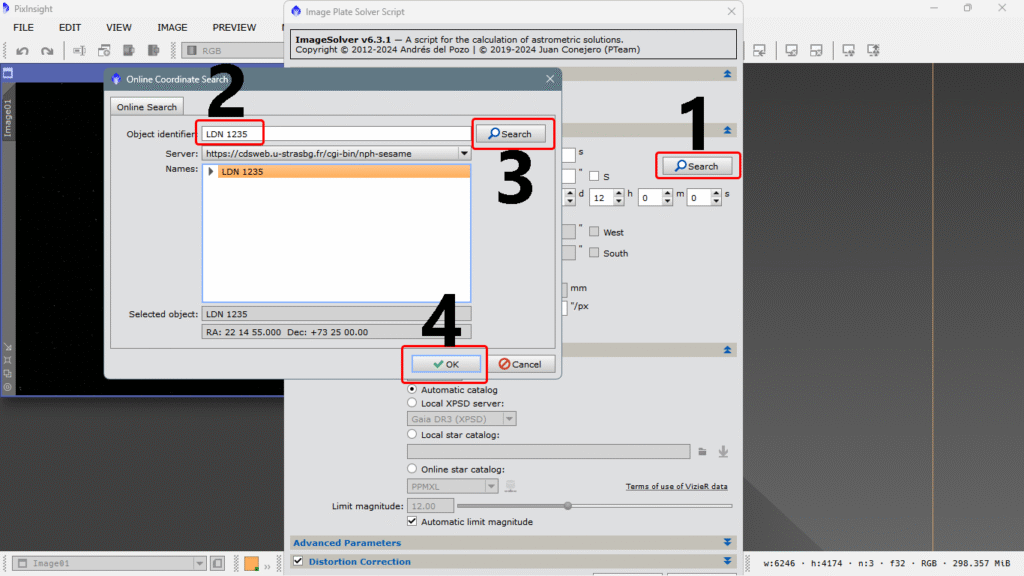
We expand the Image parameters tab, and if there are no coordinates, we must input them manually. We click on SEARCH and a new window opens, we write the name of the object, and finally just accept with OK.
Now we have the celestial coordinates, but to be more precise, and if we later want to annotate asteroid paths or comet positions that may be in the field, we must enter the exact date and time as well, along with our terrestrial coordinates. It should be noted that to annotate asteroids and comets, we must download the catalogs available on the Pleiades Astrophoto website.
We have manually entered all the data, including even the pixel size of our sensor, which we can easily find by doing a quick online search, and that’s it.
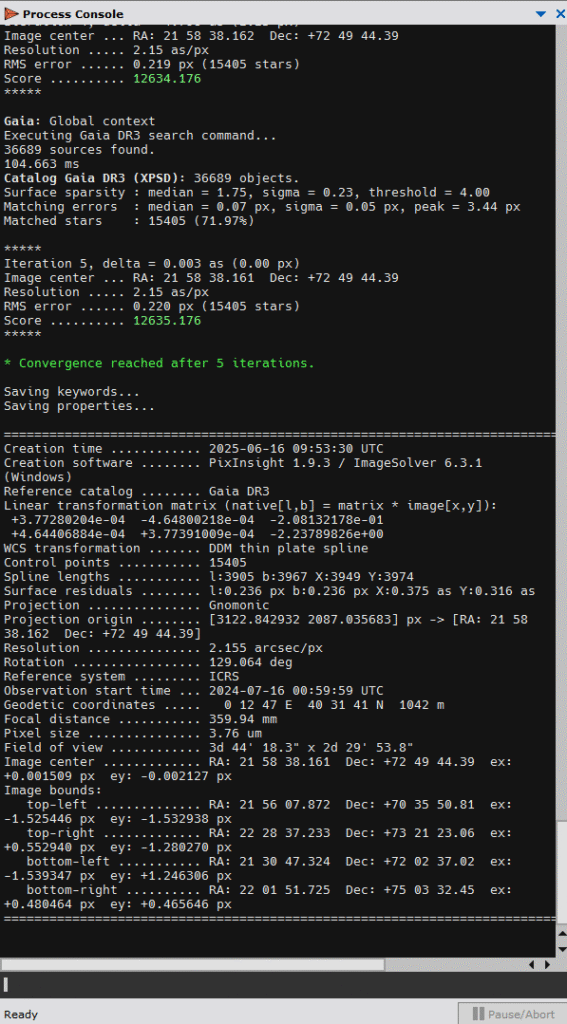
We simply press OK and indeed, the script went to GAIA to find a field with that resolution and that size, and each star is exactly where it should be. Metadata is inserted into the file header, and the file becomes a .xisf. The process console tells us that after five iterations, it found all the matches and that we now have the astrometric solution completed.
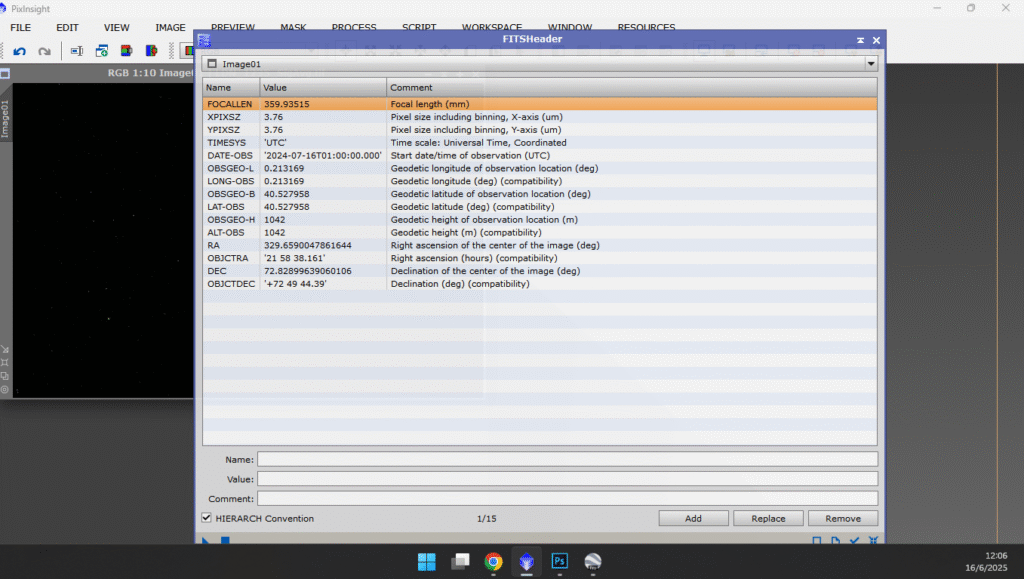
We open the FITS Header and verify that everything is indeed in order. Keep in mind that if we don’t do this, we won’t be able to use tools that rely on this astrometric data to function, such as Spectrophotometric Color Calibration, or Multiscale Gradient Correction, nor Spectrophotometric Flux Calibration or any tool that works with external data, which will become increasingly important in PixInsight—in fact, they already are. The ones I just mentioned are currently the most powerful in the program and are rendering iconic tools like DBE or Color Calibration obsolete. And I know new ones are coming very soon. Let’s take a look at the created data:
Everything looks good; we can continue processing with total peace of mind.
See you soon.