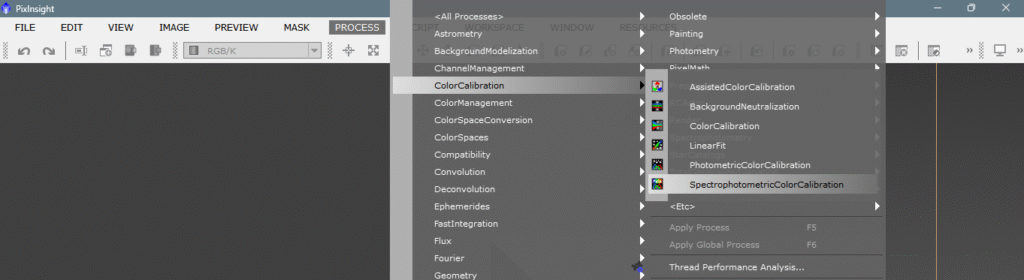
Spectrophotometric Color Calibration
It is an extrinsic color calibration tool, meaning it uses spectrophotometric data obtained from the GAIA DR3/SP catalog and compares the actual color of the provided field with the color shown in our image; if we have indicated which sensor and which filter we used, the color calibration will be perfect.
The console
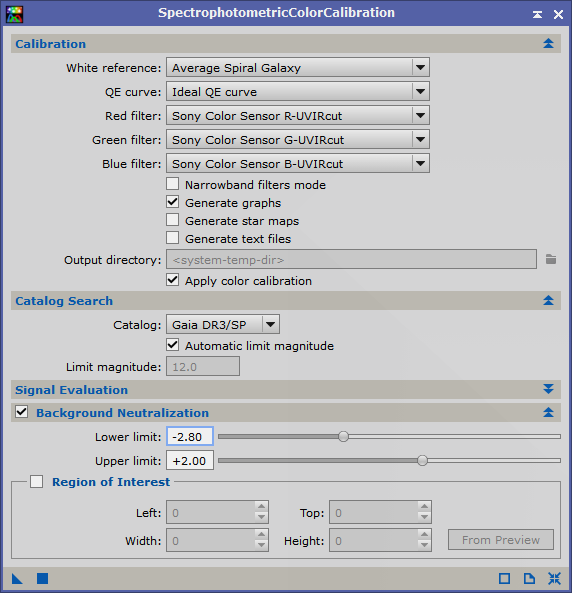
1 – White Reference
By default, the option is Average Spiral Galaxy; in general terms and from our perspective (we are inside a spiral galaxy), the average of the combined light of hundreds of spiral galaxies is sufficiently representative of the general color of deep space, that is, it is the most likely or most logical white reference for the vast majority of cases, which is why it is set as the default option.
We have many options, many spectral types of stars; A and B type stars, which are very hot (blue), tend to introduce a red cast. Cooler (red) references, such as K and M type stars, will introduce bluish tones.
We also have other types of galaxies: barred, barred spirals, elliptical, irregular, etc. Personally, to use this kind of specific white reference, it would have to be in a photo where the galaxy in question occupies the majority of the frame; otherwise, and unless it were a narrowband photo in which I would choose Photon Flux, I would always go for the default value, that is, Average Spiral Galaxy.

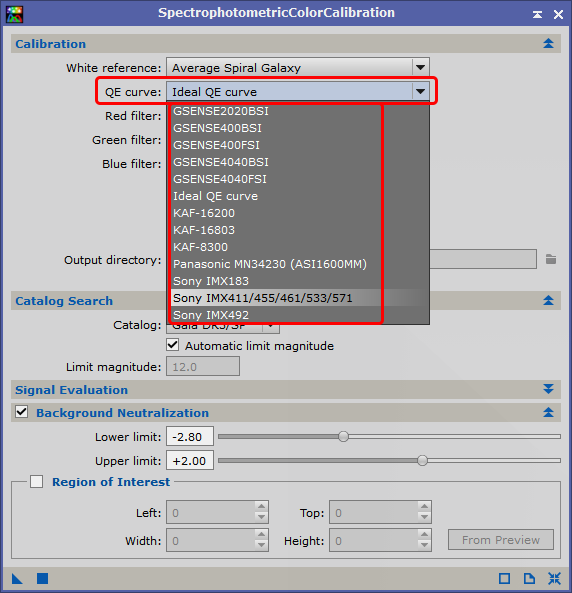
2 – Quantum Efficiency Curve
The quantum efficiency curve is responsible for inputting the parameters provided by detector (sensor) manufacturers; if we don’t find our sensor model, we will leave the default value Ideal QE curve, which would represent an average statistic—valid, though not exact; better that than nothing haha. In the dropdown, we will find a list of the most common sensors used in astrophotography; if we see ours, we select it.
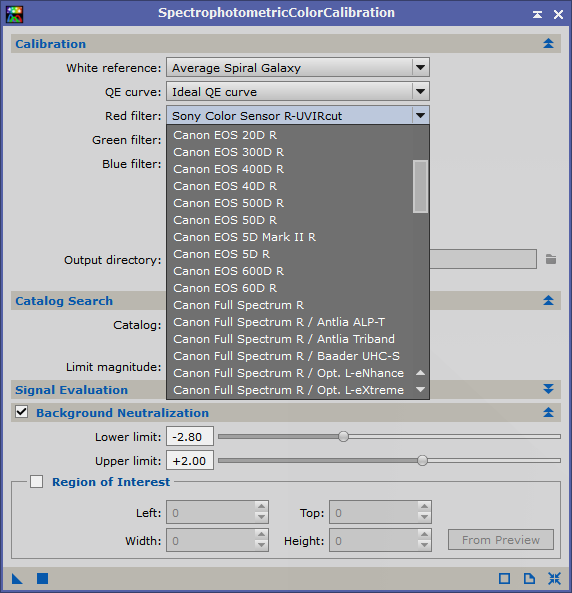
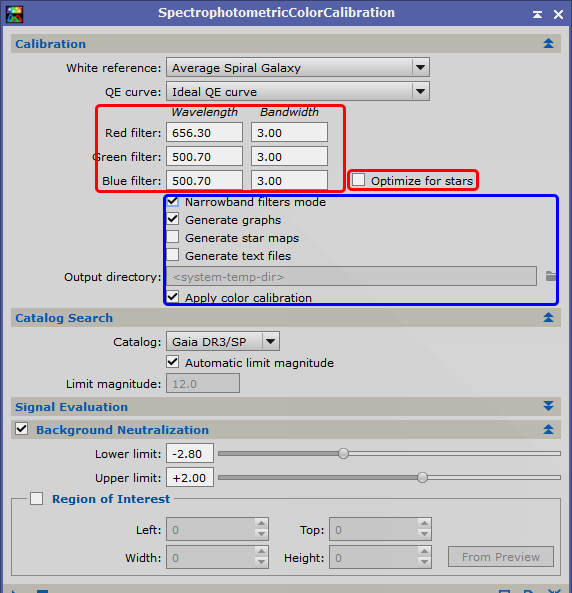
3 – Red, Green, and Blue filters
We will choose the filters we used in our camera. It should be noted that many cameras already come with a built-in filter from the factory, so we will find combinations between camera brands (sensors with built-in filters) and mounted filters, color band filters, etc. We will choose the one closest to ours; if we find the exact combination, even better.
4 – Narrowband Filters Mode
We will select this option if we used pure narrowband filters; we just need to add the bandwidth in nanometers of each filter in each channel. We would activate the option Optimize for stars only in images where stars are the predominant element and narrowband objects are minimal; it is deactivated by default.
We can extract the graph that will show us the result compared to GAIA (ideal vs real), a map of the stars used for the calibration, and, if we want, a .CSV file with all the information. Of course, we will activate Apply color calibration.
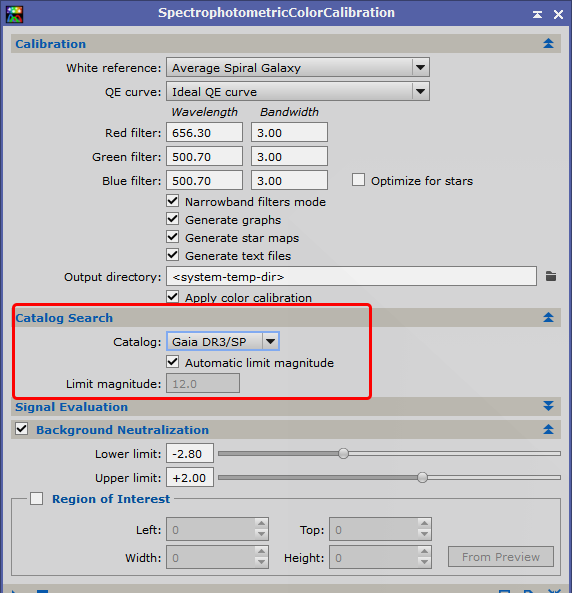
5 – Catalog Search
In this section, we will choose the GAIA SP (SpectroPhotometric) catalog, which will be the reference against which we will compare our photo. We can leave the magnitude limit on automatic (recommended), and SPCC will establish an optimal magnitude, based on the data, the field, and the resolution of our photo.
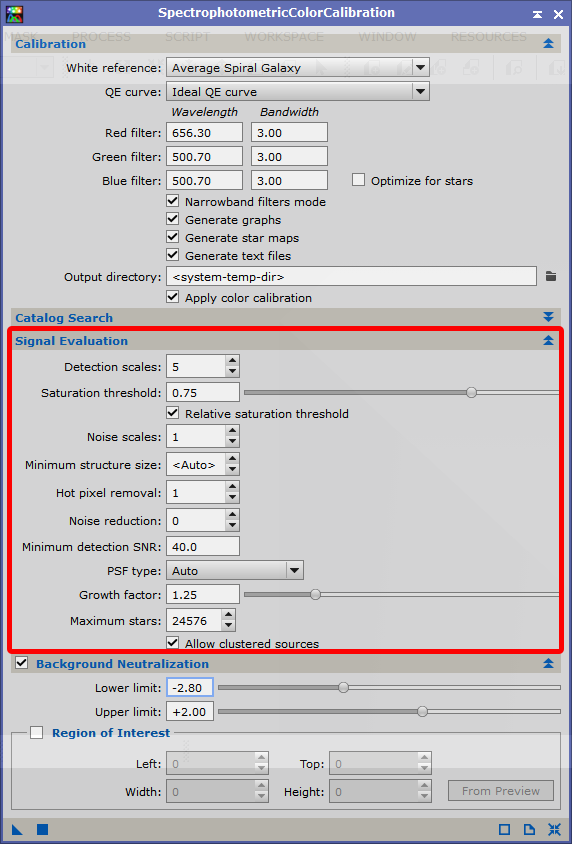
6 – Signal Evaluation
Perhaps the most difficult parameter to understand and configure; in short, it would be the analysis tool to precisely adjust and, based on the dispersion of each channel, calculate the total flux of each RGB source and the matches with the stars in the catalog—this is how it can determine the best factor to apply in the white balance based on the color (spectrum) of the stars and the filter used. If we don’t want to complicate things, it’s best to leave it with the default parameters.
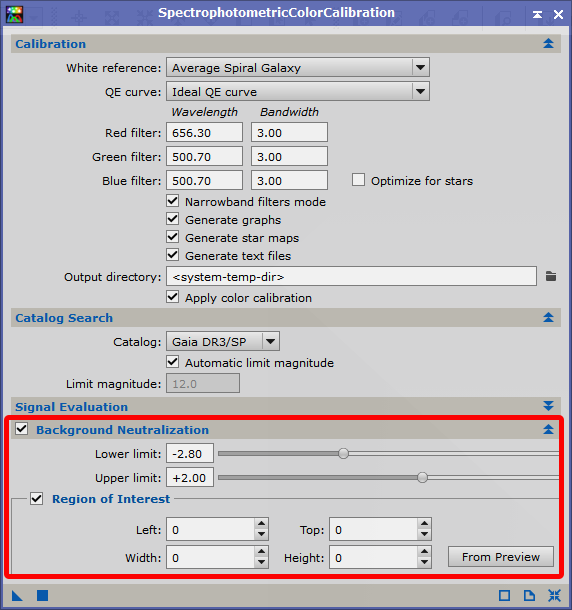
7 – Background Neutralization
A very important parameter, as it will also calibrate the background color. The best approach is to take a preview of a part of the sky where we believe there is no dominant nebulosity; ideally, it would be a region of just background, but that’s a remote option with very low probability. We will choose a crop without nebula, as dark as possible, and with as few stars as possible.
And that’s it; if we manage to enter the correct parameters and the ones closest to our optical setup, we will achieve a very efficient and accurate color calibration, based on extrinsic and highly reliable data.
Until next time.